Here we will cover the following topics:
- Mouse modes
- Choosing a geometry
- Free-hand drawing
- Changing properties
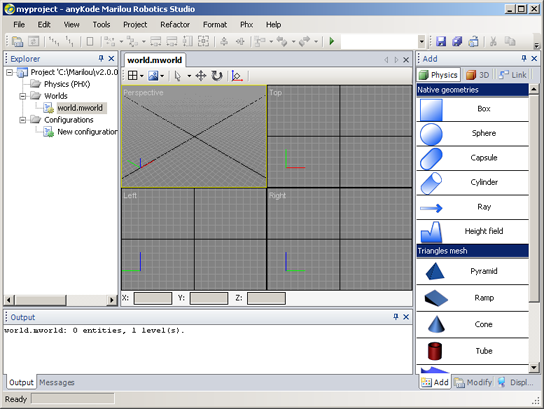
1. Preparation
|
Step |
- Open the project you created in the Creating a project tutorial.
- Select the Add tab (Manipulation panel)
- Make sure the Geom tab is present as shown below.
|
The Marilou work area should like this:
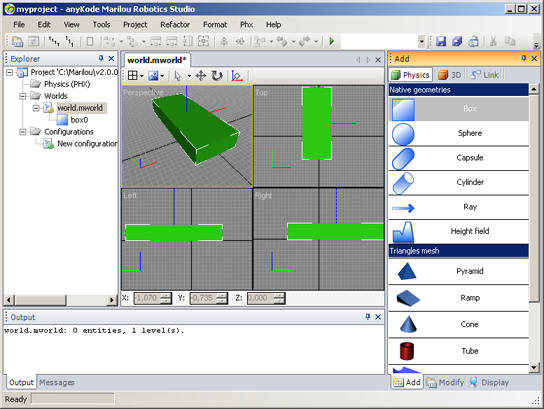
2. Drawing a geometry (box)
|
Step |
Creation in Mouse mode
- Click on "Box": the mouse cursor changes to red when it passes over a 3-D view. The red cross-shaped cursor indicates that creation using Mouse mode is activated.
- Place your cursor over the "perspective" view in the upper left corner (the cursor is displayed as a red cross)
- Click once to activate the view: the view's frame becomes yellow.
|
Free-hand drawingThere are several phases in creating new geometries. Read the following instructions carefully before you begin.
- Place your cursor in the center of the perspective view.
- Left-click and hold the mouse button down. This activates creation, and you have just selected the bottom corners of the box.
- Move the mouse to set the length and width of the box.
- Release the mouse button.
- Move the cursor to set the height of the box.
- After you have set the height, left-click once again to accept creation.
- Note: you may cancel the creation in progress by pressing the Escape key on your keyboard.
|
Your screen should look something like this (not counting the colors or dimensions):
3. Changing the box
|
Step |
Description |
Return to selection mode
- Quit creation mode by clicking on selection mode as shown below:
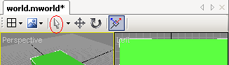 |
Note the two cursors to the right of the selection cursor in the icon bar. These are the move and rotate cursors.
You may activate selection mode by pressing the Escape key twice. |
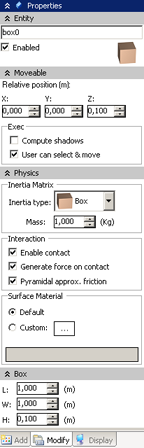
Using the modification panelMethod 1 for accessing box properties
- Make sure your mouse cursor is in selection mode.
- Left-click on the shape you created so that the borders around the box (white) are shown (see picture on right). When the bounding box is displayed, it means that the shape is selected.
- Click on the Modify tab to see box properties.
Method 2 for accessing box properties
- When you double-click on the box, the Modify tab automatically opens on the screen.
|
Your screen should look something like this: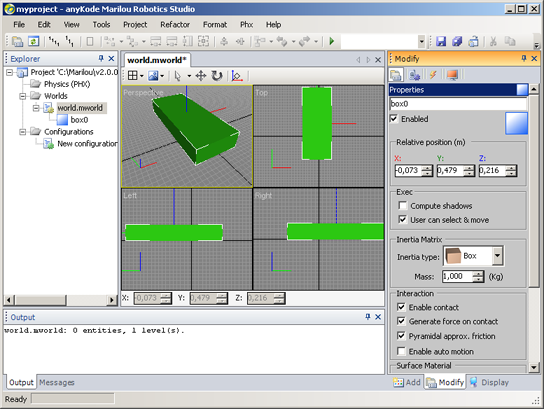 |
|
|
Change the box's relative position: Enter 0 for the X and Y axes, and 0.1 for ZChange box properties: Enter 1.0 for L and W, 0.1 for HThe box now looks like this:  |
|
|
Save your changes. |


 Description